ADVERTISEMENT
🧰 Step-by-Step Directions
-
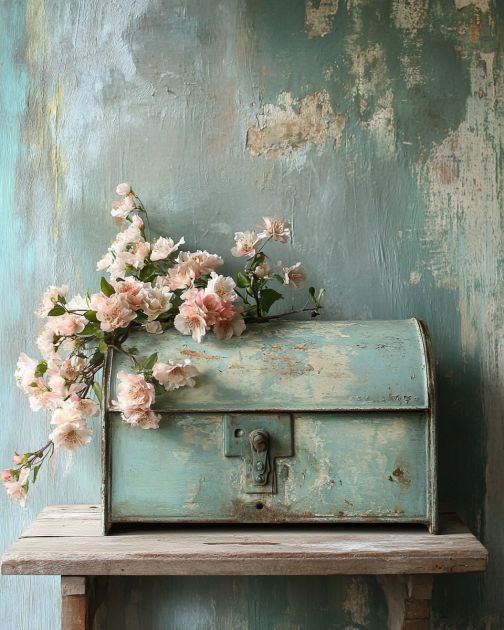
Clean & Prep
Thoroughly clean the mailbox to remove dirt and rust. Sand any rough areas using medium and fine grit sandpaper to ensure a smooth painting surface. -
Prime the Surface
Apply a coat of metal primer to help the paint adhere. Allow the primer to fully dry, following the manufacturer’s instructions. -
Paint
Spray the mailbox with your chosen outdoor paint color. Use several light coats for an even finish, letting each coat dry completely before applying the next. -
Seal It
Once dry, apply a coat of clear sealant spray to protect your mailbox from weather elements. -
Mount the Mailbox
Decide on a location and use mounting brackets or hooks to attach the mailbox to a wall or fence. Make sure it’s at a convenient height for tool access. -
Secure in Place
Use screws and a drill or screwdriver to fasten the mailbox securely. -
Decorate (optional)
Add decorative details with stencils, decals, or hand-painted designs to personalize your new garden organizer. -
Fill with Tools
Store your most-used garden tools inside for quick and easy access.
🎨 Variations & Customization Tips
-
Try different paint techniques, such as distressing or chalk paint for a vintage look.
-
Attach hooks to the bottom of the mailbox for hanging gloves or hand tools.
-
Personalize with your name or a favorite garden quote using stencils or hand lettering.
-
Use multiple mailboxes for sorting different tools—one for hand tools, another for pruners and trowels.
🌿 Final Touch
This upcycled mailbox tool holder is not just functional—it’s a conversation piece and a charming addition to any garden. Whether you’re a seasoned gardener or just getting your hands dirty for the first time, this project is a delightful way to combine creativity with sustainability.
ADVERTISEMENT
