ADVERTISEMENT
Step-by-Step Instructions: How to Make Homemade Crunch Bars
Follow these straightforward steps for foolproof no-bake chocolate bars.
Step 1: Prepare Your Pan Start by lining an 8×8-inch baking dish or a deep baking tray with parchment paper. Leave a little overhang on the sides. This “sling” method ensures you can easily lift the entire block of chocolate out of the pan once it has set, making slicing a breeze.
Step 2: Measure the Cereal Add three cups of your crispy rice cereal into a large mixing bowl. Make sure the bowl is large enough to allow for vigorous stirring without spilling the cereal over the edges. Set this aside.
Step 3: Melt the Wet Ingredients In a microwave-safe bowl, combine the chocolate chips, peanut butter, maple syrup, and coconut oil. Microwave in 30-second increments, stirring thoroughly between each burst. The residual heat will melt the chocolate, so be careful not to overheat it, which can cause the chocolate to seize and become grainy. (Alternatively, you can melt these ingredients on the stovetop using a double boiler over low heat.)
Step 4: Combine and Coat Once the chocolate mixture is completely melted, smooth, and glossy, pour it directly over the crispy rice cereal. Use a silicone spatula to gently fold the mixture together. Be patient and fold from the bottom up to ensure every single piece of cereal is fully coated in the decadent chocolate mixture.
Step 5: Press and Chill Transfer the coated cereal mixture into your prepared baking dish. Use the back of your spatula to press the mixture down firmly and evenly into the corners. The firmer you press, the better the bars will hold together when sliced. Place the dish in the refrigerator to chill for at least one hour, or until the chocolate is completely firm to the touch.
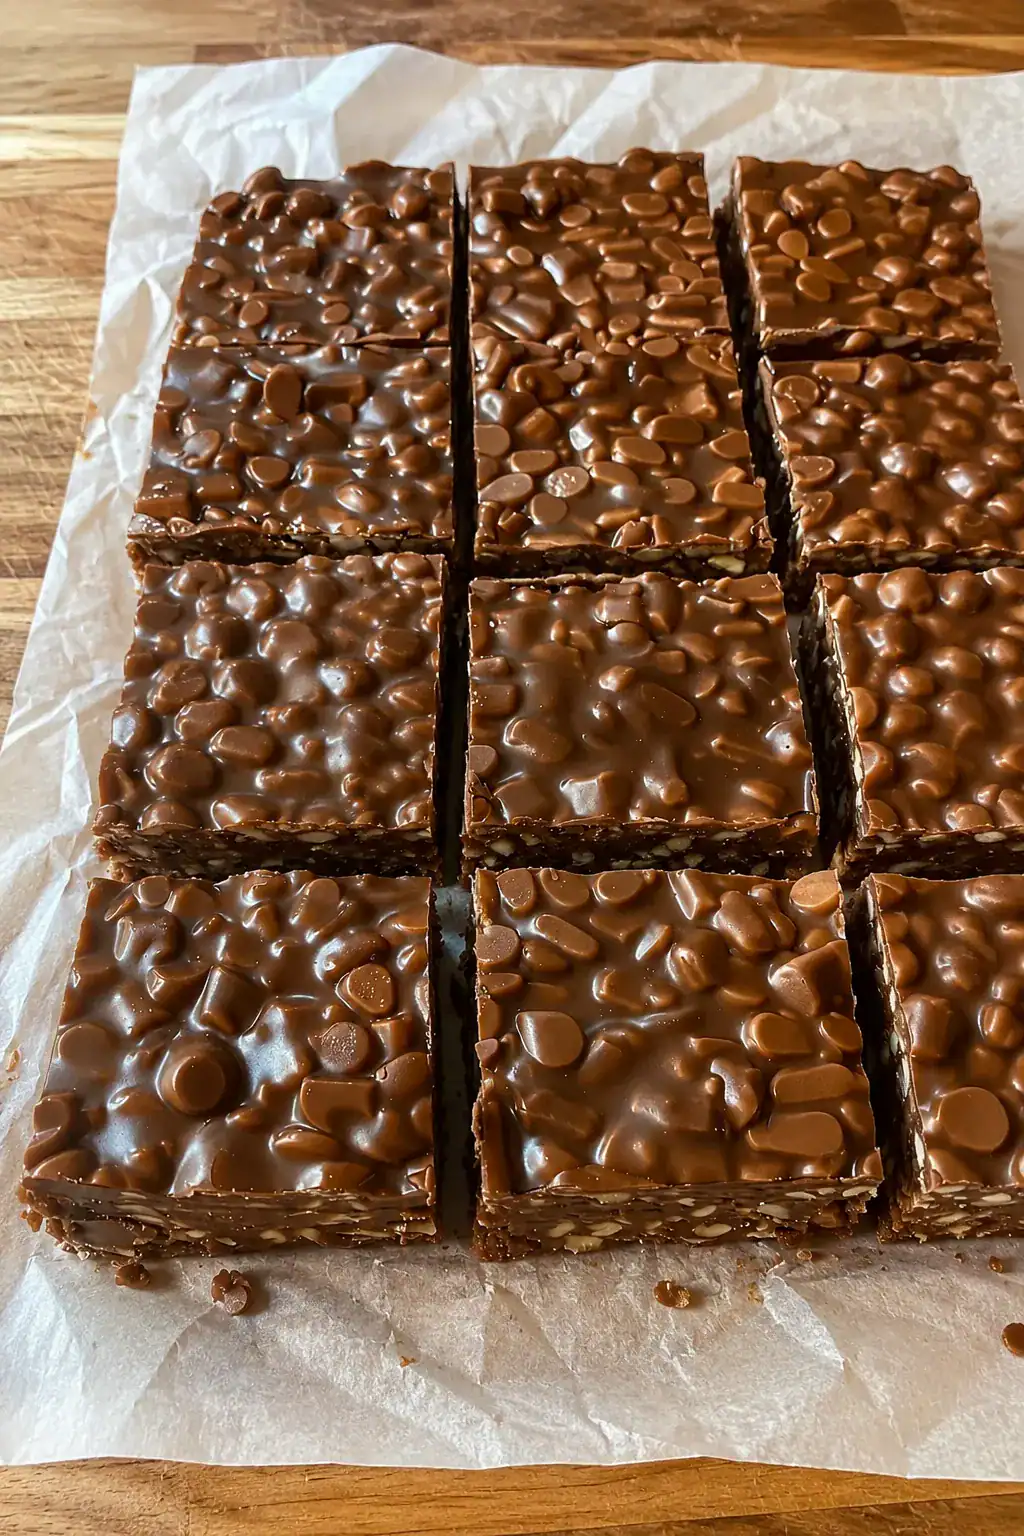
Step 6: Slice and Serve Once set, use the parchment paper overhang to lift the block out of the pan. Place it on a cutting board and use a sharp knife to slice it into bars or squares.
Pro Tips for the Perfect Chocolate Crunch
To guarantee your copycat crunch bars turn out flawlessly every single time, keep these expert tips in mind:
- Do Not Crush the Cereal: When folding the wet and dry ingredients together, be gentle. You want to coat the cereal, not crush it into a powder. Preserving the integrity of the rice puffs is what gives the bar its signature texture.
- Add Sea Salt: For a gourmet twist, sprinkle a pinch of flaky sea salt over the top of the mixture right before placing it in the fridge. The salt enhances the chocolate flavor beautifully.
- The Hot Knife Trick: If you are struggling to get clean slices without cracking the chocolate, run your knife under hot water, wipe it completely dry, and then slice into the chilled chocolate block. The warm blade will glide right through.
Flavor Variations and Customizations
One of the best things about making homemade candy is the ability to customize it to your exact preferences. Here are a few exciting ways to switch up the flavor:
- White Chocolate Crunch: Swap the semi-sweet chocolate chips for vegan white chocolate chips for a completely different, creamy flavor profile.
- Protein-Packed: Stir a scoop of your favorite unflavored or chocolate protein powder into the melted chocolate mixture before pouring it over the cereal for a great post-workout snack.
- Festive Add-Ins: Fold in a handful of crushed peppermint candies for the holidays, or mini marshmallows and graham cracker bits for a fun s’mores crunch bar.
How to Store and Freeze Your Chocolate Bars
These bars are incredibly meal-prep friendly and make fantastic make-ahead desserts.
To Store (Room Temperature or Fridge): Because coconut oil softens in warm environments, it is best to store these crunch bars in an airtight, sealable container. If your kitchen is cool, they will stay fresh at room temperature for up to 2 weeks. If you live in a warmer climate or just prefer a crisper, colder bite, store them in the refrigerator.
To Freeze: These bars freeze exceptionally well! Wrap each individual bar tightly in parchment paper, then place them in a large ziplock freezer bag. They will keep in the freezer for up to 6 months. You can eat them straight from the freezer for a super crunchy treat, or let them thaw on the counter fo
a few minutes before enjoying.
ADVERTISEMENT
