ADVERTISEMENT
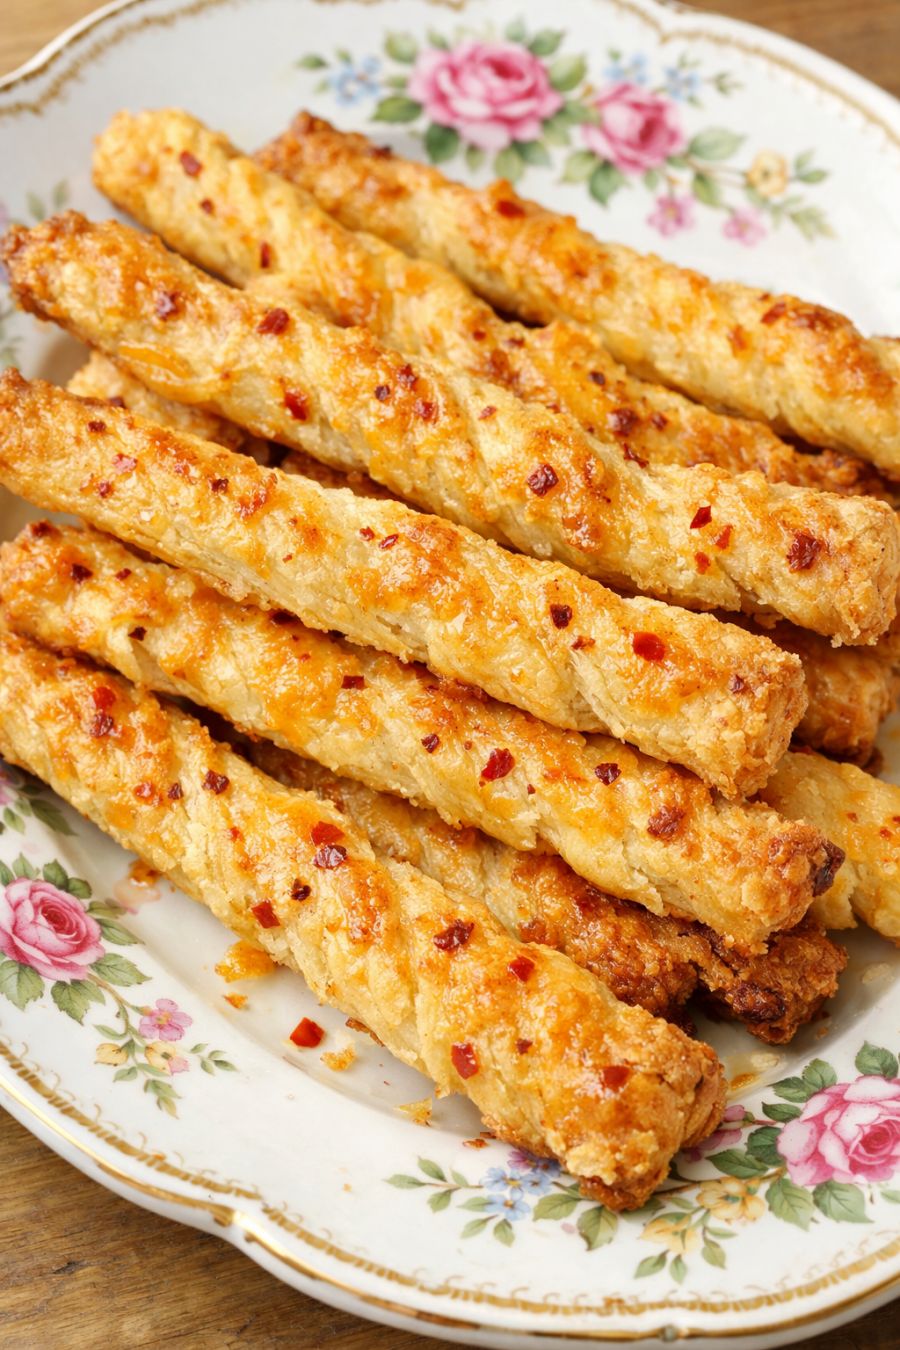
Southern Cheese Straws are a classic savory snack that perfectly combines buttery richness, sharp cheddar flavor, and a delicate, crisp texture. Originating in the American South, these golden, crunchy treats are often served at parties, holidays, and gatherings as a beloved appetizer. Their light, crumbly bite and bold cheesy taste make them irresistible—once you start eating them, it’s hard to stop.
What makes cheese straws special is their simplicity. With just a handful of ingredients, you can create a snack that feels elegant yet comforting. Whether piped into traditional straw shapes or baked as simple sticks, this recipe delivers consistent, flavorful results every time.
Ingredients
Southern cheese straws rely on a few key ingredients that work together to create their signature taste and texture.
Main Ingredients
- 2 cups sharp cheddar cheese, freshly grated
- 1 cup unsalted butter, softened
- 2 cups all-purpose flour
- ½ teaspoon salt
- ½ teaspoon black pepper
Optional Flavor Additions
- ½ teaspoon cayenne pepper (for heat)
- ½ teaspoon paprika
- ½ teaspoon garlic powder
- ½ teaspoon mustard powder
Why These Ingredients Work
Sharp cheddar cheese:
Provides bold flavor and richness. Freshly grated cheese melts better and creates a smoother dough.
Butter:
Gives the straws their tender, melt-in-your-mouth texture.
Flour:
Provides structure and crispness.
Seasonings:
Enhance flavor and allow customization.
How To Make Southern Cheese Straws
Follow this step-by-step process for perfect cheese straws.
Step 1: Preheat the Oven
Preheat oven to 350°F (175°C).
Line baking sheets with parchment paper.
Step 2: Cream Butter and Cheese
In a mixing bowl, combine softened butter and shredded cheese.
Mix until smooth and well blended.
This step is crucial for achieving the right texture.
Step 3: Add Dry Ingredients
Add:
- Flour
- Salt
- Pepper
- Optional spices
Mix until a soft dough forms.
Step 4: Shape the Dough
There are two common methods:
Piping Method (Traditional)
- Transfer dough to a piping bag with a star tip
- Pipe long strips onto baking sheet
Rolling Method (Simple)
- Roll dough and cut into thin strips
Step 5: Bake
Bake for 12–15 minutes or until lightly golden.
Step 6: Cool
Let cool on a rack until crisp.
Step 7: Serve
Serve at room temperature.
You Must Know
1. Use Freshly Grated Cheese
Pre-shredded cheese contains additives that affect texture.
2. Butter Must Be Soft
Not melted—soft butter creates the right dough consistency.
3. Don’t Overmix
Overmixing can make the straws tough.
4. Keep Dough Cool
Warm dough can be difficult to shape.
5. Watch Baking Time
Overbaking can make them too dry.
Topping Variations
Spicy Cheese Straws
Add cayenne or chili flakes.
Herb Cheese Straws
Add rosemary, thyme, or parsley.
Garlic Parmesan
Add garlic powder and Parmesan cheese.
Smoky Paprika
Adds depth and warmth.
Everything Bagel Style
Sprinkle seasoning on top before baking.
Sweet & Savory
Add a pinch of sugar for balance.
Make It A Meal
While cheese straws are typically a snack, they can be part of a meal.
Serve With Soups
- Tomato soup
- Potato soup
- Vegetable soup
Pair With Salads
- Caesar salad
- Mixed greens
Appetizer Platter
Serve with:
- Crackers
- Cheese
- Olives
- Dips
Party Snack
Perfect for:
- Holidays
- Gatherings
- Events
Pro Tips
1. Chill Dough Before Piping
Helps maintain shape.
2. Use a Strong Piping Bag
Dough can be firm.
3. Bake Evenly
Rotate trays halfway through baking.
4. Use Parchment Paper
Prevents sticking and ensures even baking.
5. Make Ahead
Store dough in fridge for up to 2 days.
6. Freeze Dough
Freeze for up to 2 months.
7. Store Properly
Keep in airtight container for up to 1 week.
Recipe FAQs
Why are my cheese straws crumbly?
Too much flour or not enough butter.
Can I use different cheese?
Yes. Try:
- Gruyère
- Parmesan
- Pepper jack
Can I make them gluten-free?
Yes. Use gluten-free flour.
How do I make them crispier?
Bake slightly longer.
Can I freeze baked cheese straws?
Yes, but texture may change slightly.
Why is my dough too stiff?
Add a small amount of milk.
Can I make them without piping?
Yes, roll and cut into strips.
How long do they last?
Up to 1 week in an airtight container.
Southern Cheese Straws

A salty and savory snack that would make a great gift as well.
- Prep Time: 15 minutes
- Cook Time: 14 minutes
- Total Time: 29 minutes
- Yield: 48 1x
- Category: Appetizer, Snack
- Cuisine: American
Ingredients
Scale
- 2 cups freshly grated sharp cheddar cheese
- ½ cup (1 stick) unsalted butter, softened
- 1 ½ cups all-purpose flour
- ½ teaspoon salt
- ½ teaspoon smoked paprika (or regular paprika)
- ¼ teaspoon cayenne pepper (optional, adjust to taste)
- 2–3 Tablespoons water (as needed to form dough)
Instructions
- Preheat oven to 350°F. Line 2 baking sheets with parchment paper.
- In a large bowl, beat together 2 cups freshly grated sharp cheddar cheese and ½ cup (1 stick) unsalted butter, softened with an electric mixer until smooth and well combined.
- Add 1 ½ cups all-purpose flour, ½ teaspoon salt, ½ teaspoon smoked paprika and ¼ teaspoon cayenne pepper (if using). Mix until crumbly.
- Add water, 1 Tablespoon at a time, just until the dough holds together. Dough should be firm but pliable.
- Roll dough into a rectangle about 6×12 inches and ¼-inch thick (traditional Southern style) (traditional Southern style) on a lightly floured surface.
- Use a bench scraper, sharp knife, or pizza cutter to cut strips about ½-inch wide and 6 inches long.
- Cut each strip in half to make 3-inch straws. This should yield about 48 straws (4 dozen) from one batch.
- Drag the tines of a fork lightly down each strip to imprint ridges. This not only gives the straws a traditional look but also helps them bake up extra crispy.
- Transfer cheese straws to the prepared baking sheets, spacing them slightly apart.
- Bake on the middle rack, one sheet at a time, for about 12–14 minutes, until golden at the edges. Cool on a wire rack.
- Once fully cooled, store in an airtight container for up to 1 week.
ADVERTISEMENT
